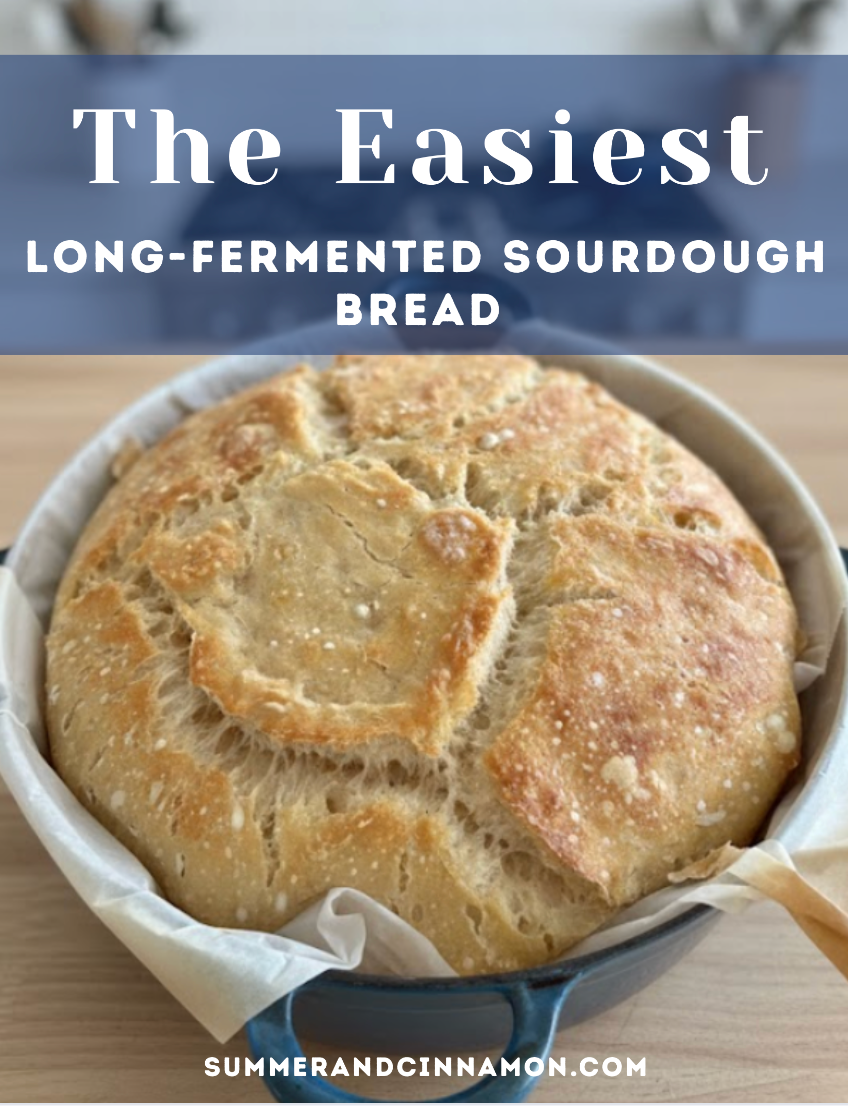
There’s something almost magical about waking up to a bowl of sourdough that has risen all on its own overnight—fluffy, bubbly, alive. If you’ve ever felt intimidated by sourdough, this recipe is going to change everything. It’s hands-off, uncomplicated, and wildly forgiving. Honestly, it’s the kind of loaf that makes you feel like you’ve been baking bread your whole life, even if it’s your very first time.
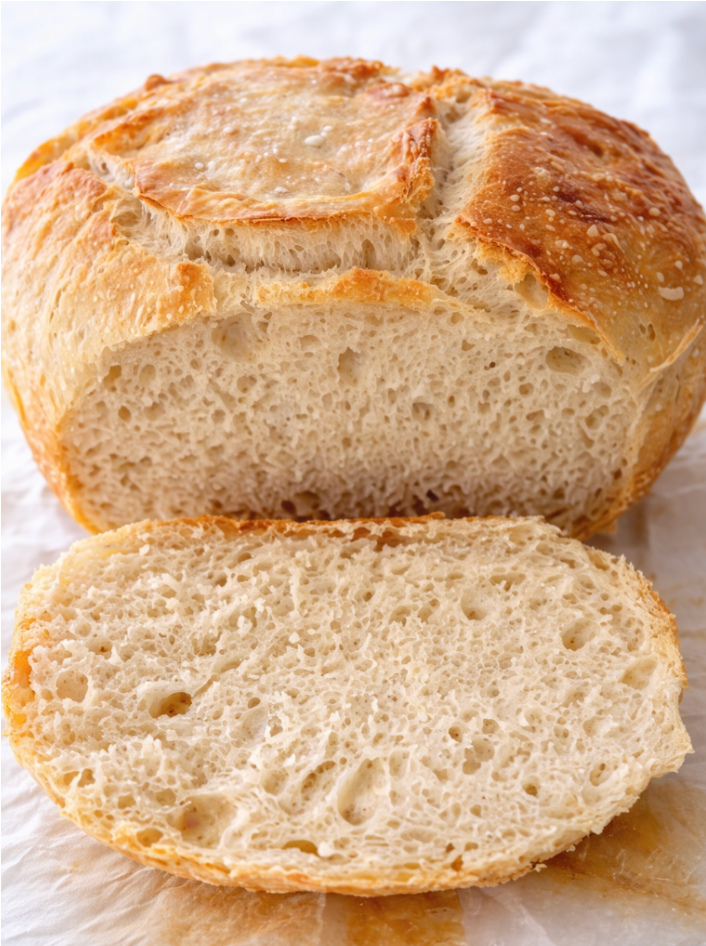
This long-fermented, no-knead sourdough sits at the sweet spot between simplicity and incredible flavor. With almost no effort, you end up with a loaf that’s tall, airy, tangy, crisp on the outside, and unbelievably moist on the inside. It’s the kind of bread that makes sandwiches taste gourmet and morning toast feel like an event.
And the best part? The dough does most of the work while you sleep.
Today I’m sharing the exact recipe I return to again and again—because it works every single time, and because it produces the kind of sourdough that makes even store-bought bread lovers stop mid-bite. Let’s dive in.
Why You’ll Love This Sourdough Bread
- No kneading, no folding, no fuss. Truly the easiest sourdough you’ll ever make.
- Perfect for beginners. The method is simple, forgiving, and consistent.
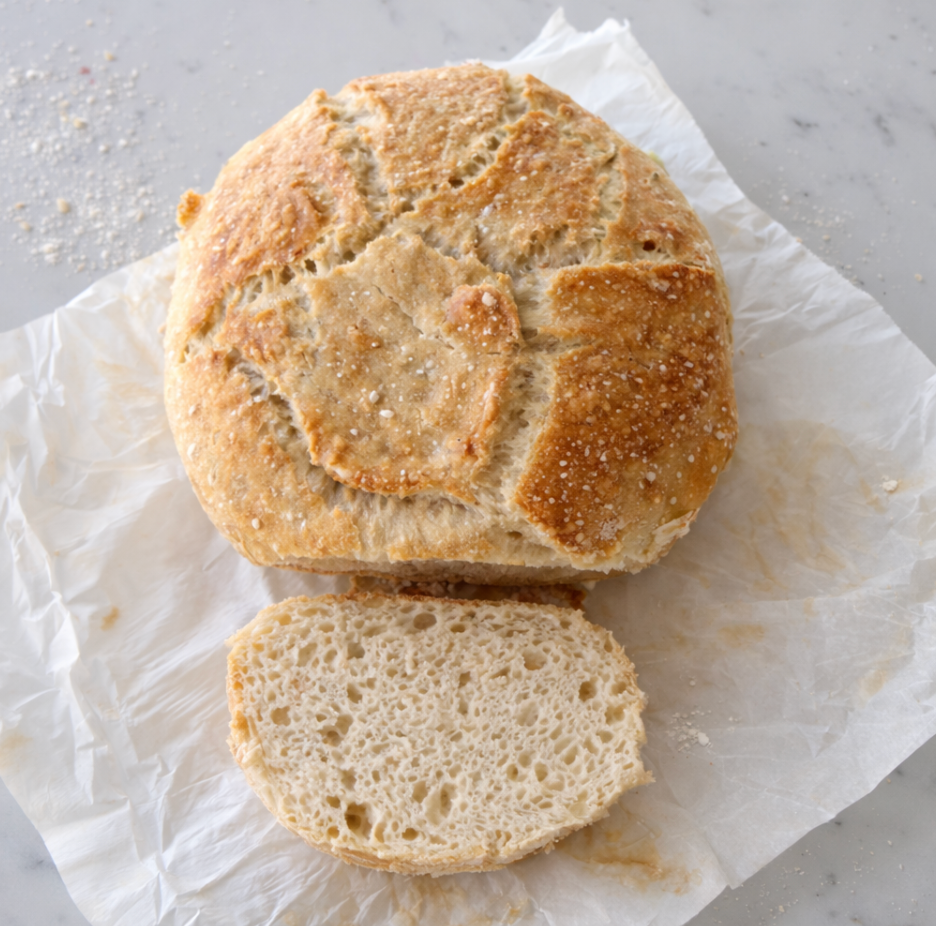
- Incredible texture. Light, airy crumb with a crispy, crackly crust.
- Long fermentation = amazing flavor. All that time builds a deep tang and rich complexity.
- Makes sandwich-perfect slices. Especially if you use a Pullman pan (my favorite).
- Naturally simple ingredients. Flour, water, salt, starter. That’s it.
Ingredients Breakdown
Here’s what each ingredient contributes to that gorgeous loaf:
Flour
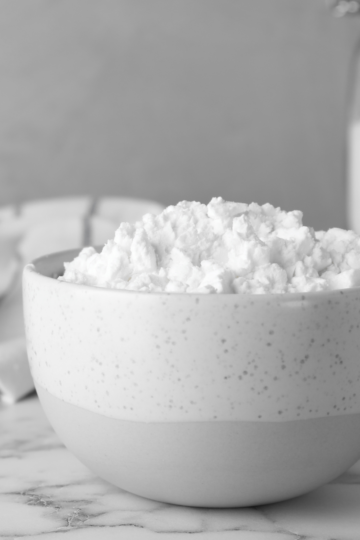
All-purpose flour works perfectly here, but you can swap in some bread flour if you want a slightly chewier texture. The large amount of flour supports the long fermentation and helps the dough rise tall.
Sourdough Starter
Use active, bubbly starter for the best rise. It doesn’t have to be at peak, but it should be lively and recently fed. This amount provides enough strength to lift the dough for the 18–24 hour rise.
Salt
Pink Himalayan salt adds minerals and flavor, but any salt you love works beautifully. Don’t skip it—salt strengthens the dough and balances the tang.
Cold Water
Cold water slows fermentation just enough to give the dough a long, steady rise. This creates superior flavor and structure.
Instructions
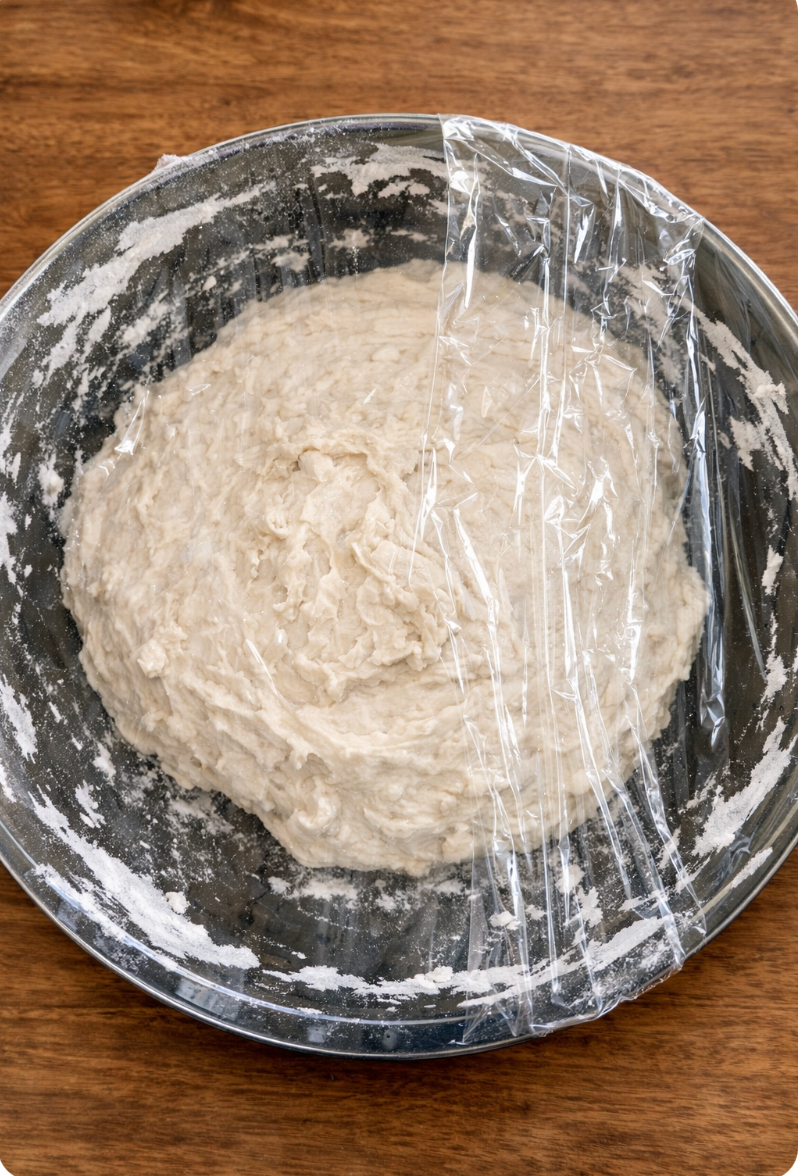
- Step 1: Mix water, salt and sourdough starter well. Then add in the flour and mix until fully incorporated. Cover and allow fermentation to begin.

- Step 2: Allow to ferment for 18-24 hours while covered.
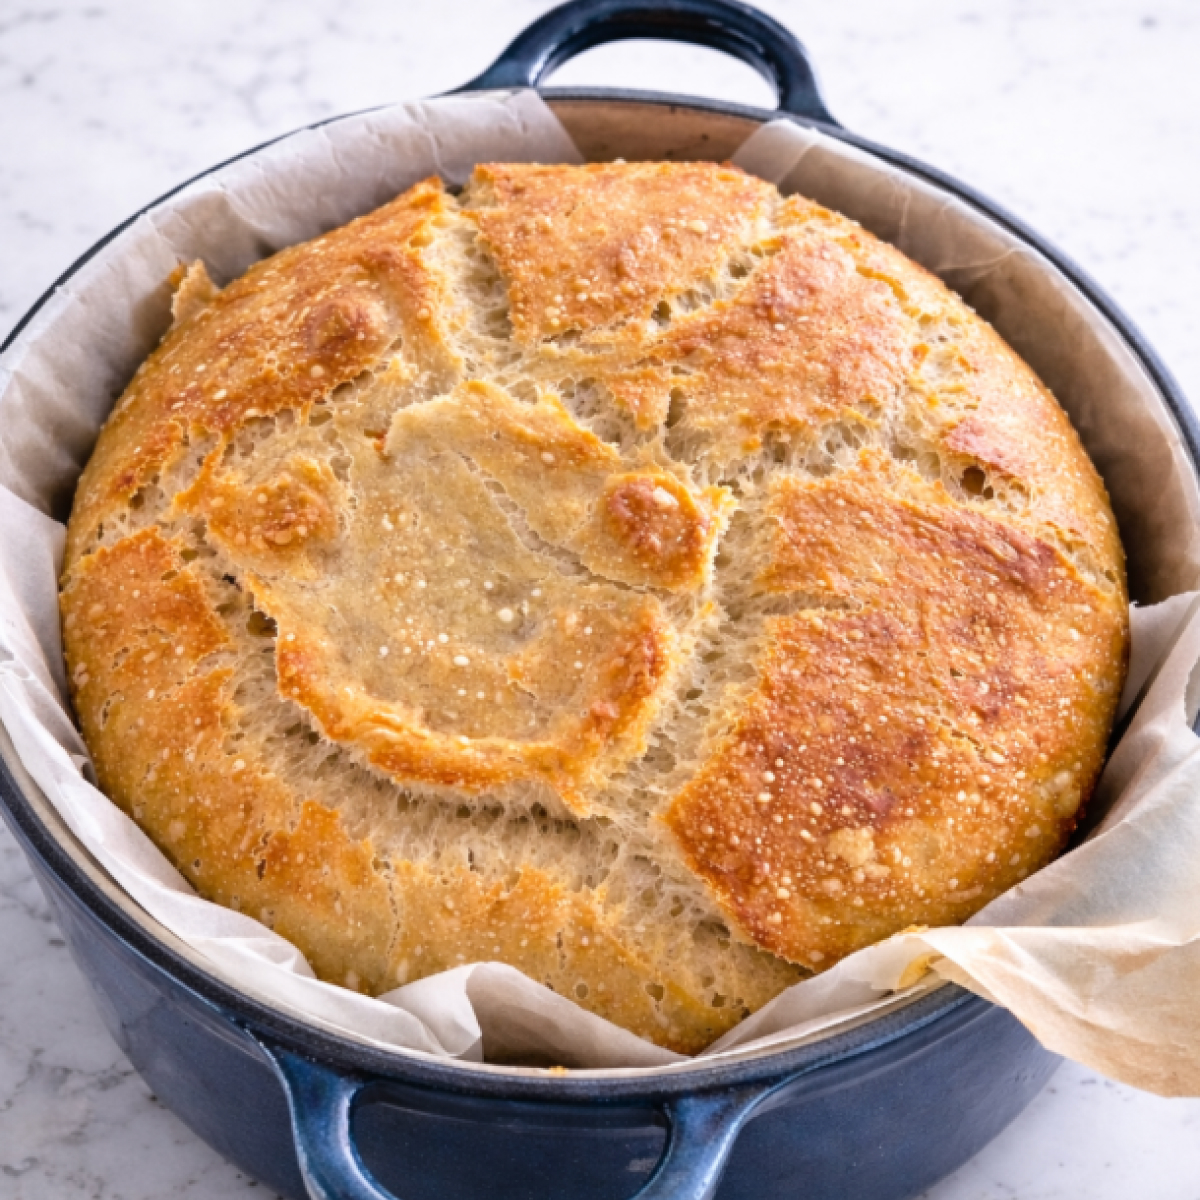
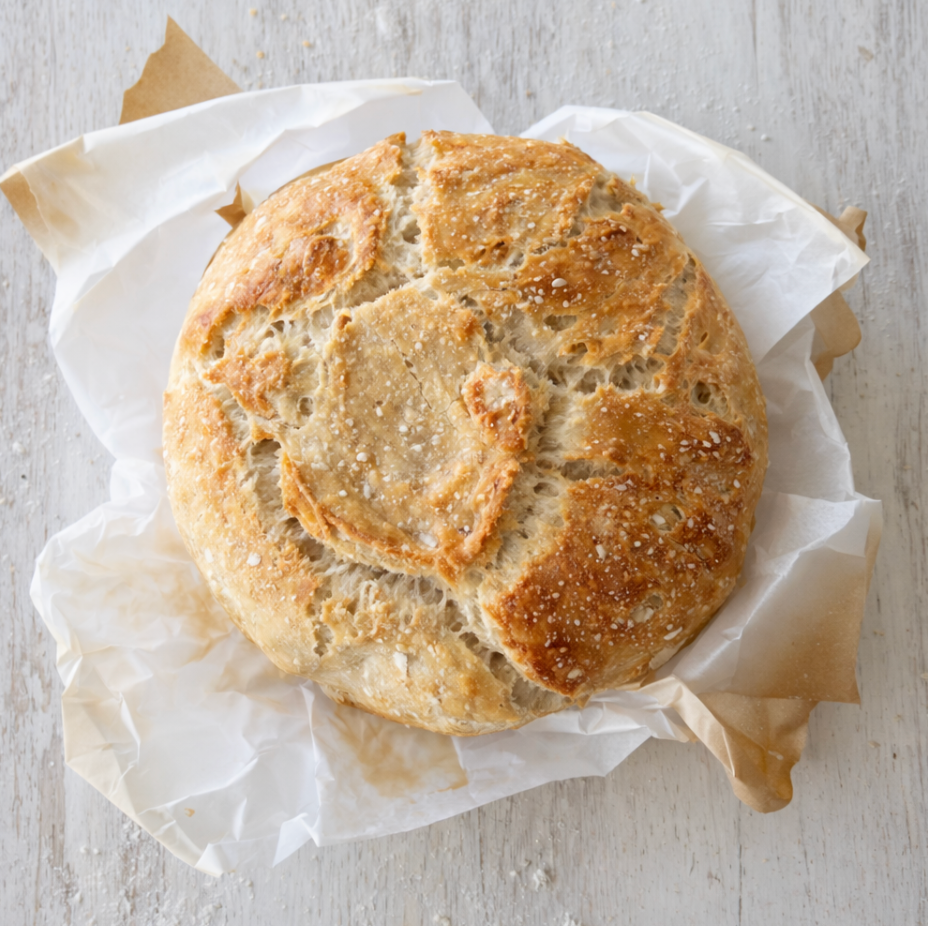
- Step 3: Put dough into parchment lined dutch oven and allow to rise for 1-2 hours (with lid on).

- Step 4: Place in 450 degree oven and bake for 40 minutes. Then remove lid and lower temperature to 425 degrees and cook for another 20 minutes.
Step-by-Step Tips for Success
1. Use a glass or non-metal bowl
Sourdough reacts better in glass or ceramic. Metal can interfere with fermentation, so stick with non-metal bowls.
2. Don’t overmix
Stir just until the dough comes together. This loaf develops structure naturally over its long rise.
3. Let it rise 18–24 hours
This long rise is what makes the crumb open, airy, and deeply flavorful.
Tip: Set a reminder so you don’t push past the 24-hour mark, because over-fermented dough can collapse.
4. Handle it gently
Once the dough has risen, think of it like a giant bubble. Move slowly and don’t punch it down.
5. Choose the right pan
All of these work:
- Pullman loaf pan with a lid (my top choice)
- Dutch oven or enameled cast iron pot
- Standard bread pans covered with foil
Each creates a slightly different crust, but all produce a stunning loaf.
6. Warm rise before baking
Covered, the dough rises 1–3 hours again in the pan. Look for the dough to reach almost to the top—this ensures height and structure.
7. Bake hot
450°F gives you that crispy, golden crust. Starting covered traps steam, which is key to loft and shine.
8. Check the internal temperature
You’re aiming for 200°F. This ensures the inside is fully cooked without drying out the crumb.
9. Remove from the pan quickly
Leaving it in the pan traps steam and can make the interior gummy.
Variations
1. Rustic Artisan Loaf
Skip the loaf pans and bake it as a round boule inside a Dutch oven. The crust becomes extra dramatic.
2. Seeded Sourdough
Stir in:
- ¼ cup sesame seeds
- ¼ cup sunflower seeds
- 2 tablespoon poppy seeds
Seeds add amazing crunch and flavor without changing the method.
3. Honey-Enhanced
Add 2 tablespoons of honey to the water for a softer, slightly sweeter loaf—great for kids and sandwiches.
4. Whole Wheat Twist
Swap 1–2 cups of all-purpose flour for whole wheat. Add an extra splash of water if needed.
5. Garlic Herb
Stir in 1 tablespoon dried Italian herbs and 2–3 cloves minced garlic for a savory, aromatic loaf.
Serving Suggestions
This bread shines in so many ways:
- Thick slices for sandwiches (especially grilled cheese—this is the BEST bread for it)
- Warm with salted butter (the crisp edges + melting butter = heaven)
- French toast (the sourdough tang makes it incredible)
- Torn into chunks for soup dipping
- Toasted under the broiler with a drizzle of olive oil
This is the kind of bread you truly use for everything.
Storage
Because sourdough naturally preserves itself, it stays fresh longer than yeasted bread.
- Room Temperature: Store in a bread bag or wrapped in a towel, 3–4 days.
- Refrigerator: Not recommended—chills stale the crumb.
- Freezer: Slice and freeze for up to 3 months. Toast straight from frozen.
FAQs
Can I shorten the rise time?
You can, but the magic comes from the long, slow fermentation. It improves texture and flavor dramatically.
What if my dough deflates?
It just fermented a little too long. Still bake it—it’ll still taste amazing but with a denser crumb.
Do I need a scale?
Not required. This recipe was developed with cup measurements to make it beginner-friendly.
Does the starter have to be active?
Yes—use starter that’s recently fed and bubbly.
Can I double the recipe?
Yes! Just use larger bowls and pans.
Why This Recipe Works
This recipe takes advantage of sourdough’s greatest strength: time.
Instead of relying on kneading, complicated folding sequences, or precise temperature control, the dough develops structure and flavor slowly over 18–24 hours. The long fermentation:
- Strengthens gluten naturally
- Deepens tang and complexity
- Creates airy, irregular bubbles
- Requires almost no work from you
The baking method seals the deal. Starting covered traps steam—giving you that bakery-style rise and glossy, crisp crust. Removing the lid allows the top to brown beautifully without drying out the inside.
Everything about this recipe is designed to give you maximum payoff with minimum effort. It’s simple, intuitive, and incredibly reliable.
Final Thoughts
There’s something special about baking sourdough, but this recipe makes it feel calm, doable, and joyful—even on the busiest days. With nothing more than flour, water, salt, and a little time, you get a loaf that’s impossibly airy inside, beautifully crisp outside, and full of rich, tangy depth. It’s the kind of bread that becomes a house staple—the one you make every week because the effort is small but the reward is huge.
Love Sourdough Everything? Try out some of my favorite sourdough recipes:
Old Fashioned Sourdough Cinnamon Rolls
Double Chocolate Sourdough Pancakes
The Easiest Long-Fermented Sourdough Bread
Ingredients
Equipment
Method
- In a large bowl, whisk the cold water, salt and starter together using a wooden spoon. Add the flour stirring until just combined. Do not overmix.
- Cover the bowl with a plate (not airtight) and let the dough rise at room temperature for 18–24 hours. Try to shape and transfer your dough around the 20–22 hour mark to avoid over-fermenting.
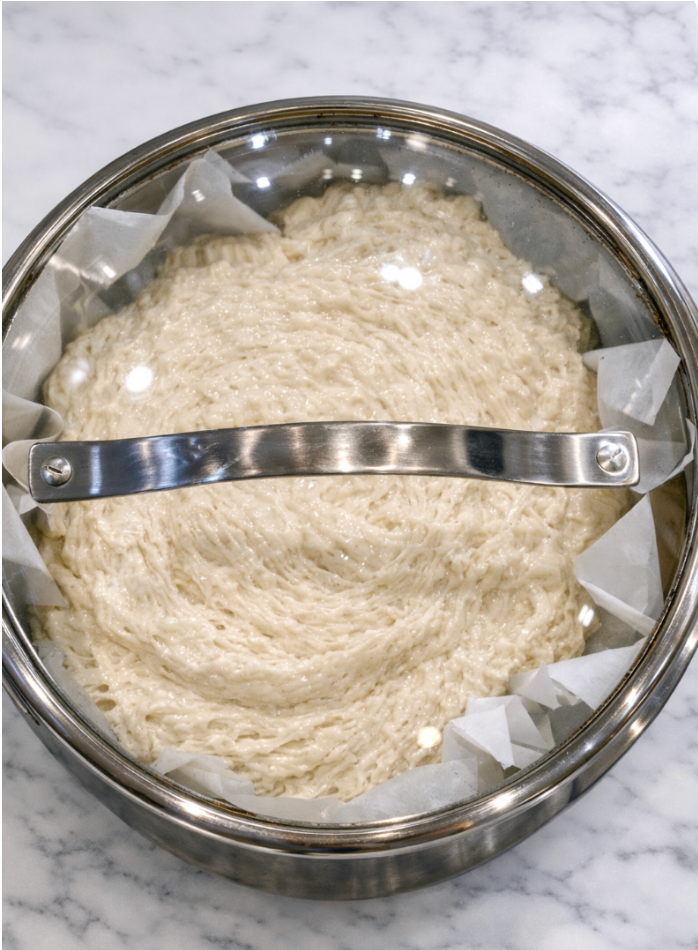
- Place a piece of parchment paper inside your Dutch oven so that it hangs slightly over the edges for easy lifting.
- Gently tip the dough into the parchment/dutch oven, being careful not to deflate the rise. If the dough feels sticky, lightly dust the top with rice flour or gluten-free flour.
- Let the dough rest directly in the parchment-lined Dutch oven for 1–2 hours, covered with the lid, until puffy and noticeably risen.
- About an hour before baking, preheat your oven to 450°F. Keep the Dutch oven covered while it continues its final rise.
- Place the covered Dutch oven into the preheated oven and bake for 40 minutes.
- Remove the lid, lower temperature to 425 degrees and bake for another 20 minutes, or until the crust is deeply golden and the loaf reaches 200°F internally.
- Use the parchment paper to lift the loaf out of the Dutch oven. Let it cool completely before slicing to prevent a gummy interior.
Notes
- Starter activity: Your starter doesn’t need to be at absolute peak, but it should be recently fed and bubbly for the best rise.
- Flour type: All-purpose flour works beautifully, but you can swap 1–2 cups for bread flour if you want a slightly chewier crumb.
- Hydration: This dough is naturally wet and sticky—don’t add extra flour. The long rise builds structure for you.
- Parchment tip: If your parchment curls or shifts, lightly mist it with water or scrunch it into a ball and flatten it back out to help it stay in place.
Related
Looking for other recipes like this? Try these:


Pin to Pinterest