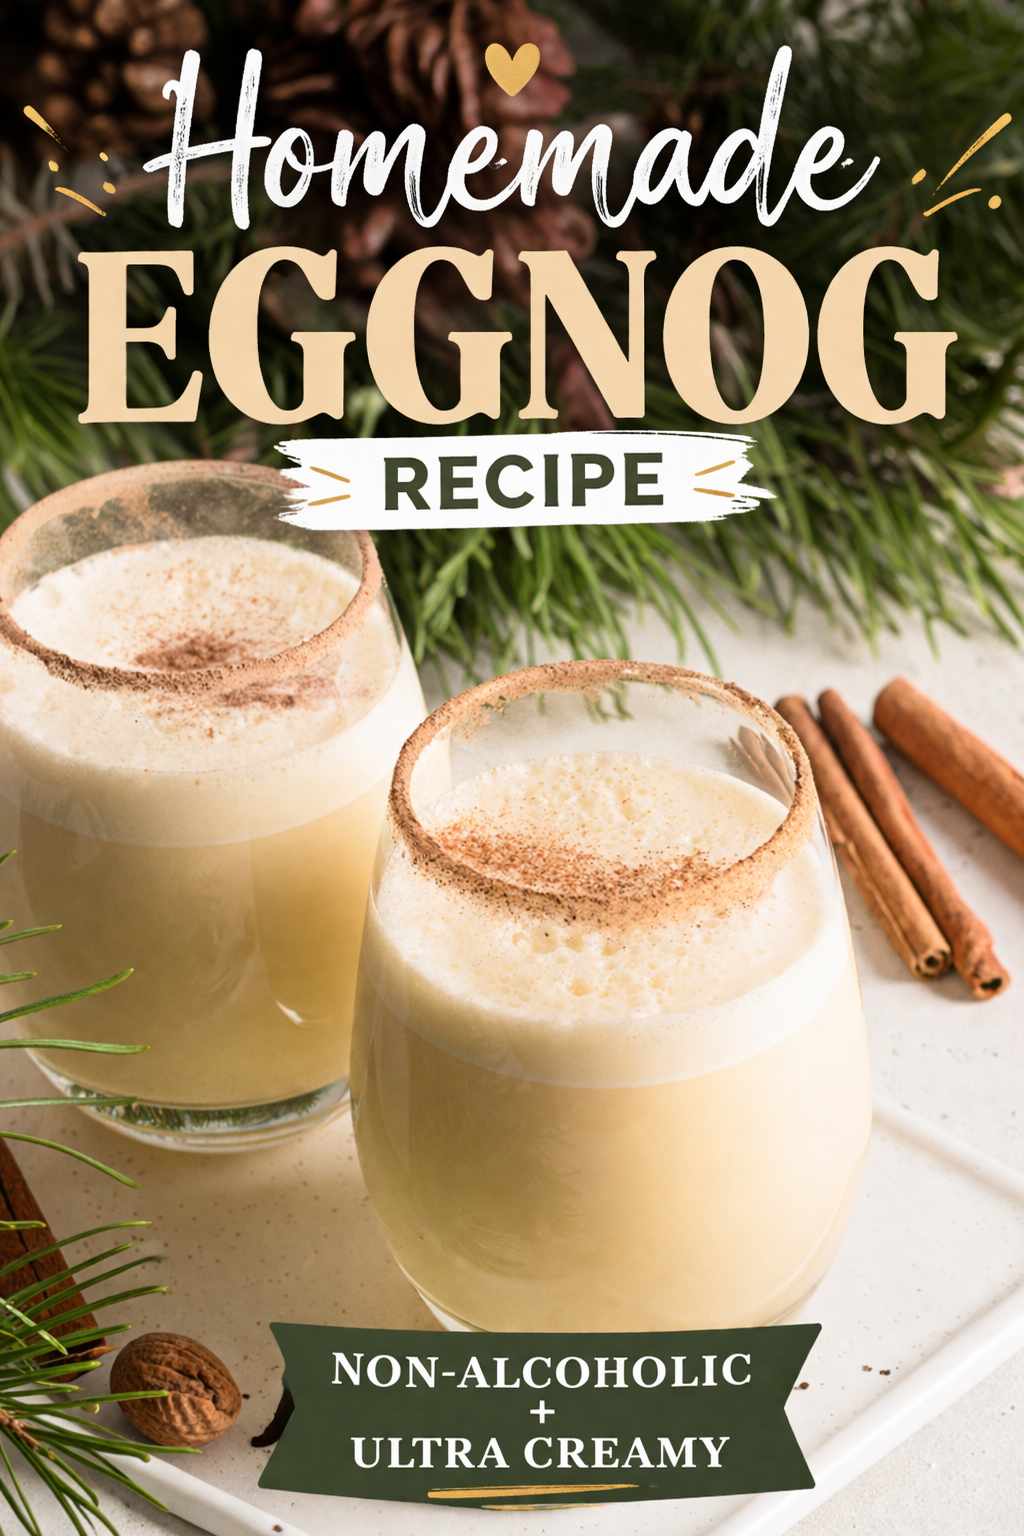
Every year, as soon as the air turns crisp and twinkling lights start showing up on front porches, I crave that first creamy sip of eggnog. It’s one of those traditions that just feels like Christmas — the kind that warms you from the inside out and brings a little nostalgic magic to even the busiest December days.
But I’ll be honest: for years, I avoided making homemade eggnog because I worried about the raw eggs. Then one year, I decided to experiment with a quick, cooked version — a smooth, custardy base that’s not only rich and luscious but also completely safe to drink. One spoonful of that warm, velvety mixture and I was hooked.
This Rich & Creamy Non-Alcoholic Eggnog has since become a staple in my kitchen every holiday season. It’s everything you love about traditional eggnog — the silky texture, the subtle sweetness, and that irresistible hint of nutmeg — all without any worry or fuss. And best of all, it’s family-friendly, which means everyone (kids included) can join in on the festive treat.
If you’ve only ever tried the store-bought kind, this recipe will change your mind forever. Homemade eggnog tastes fresher, lighter, and far more luxurious. Once you try it, you’ll never go back to the carton again.
If you love classic holiday treats, pair this with my Extra Creamy Old Fashioned Fudge, Molasses Crinkle Cookies, or Gooey Hot Chocolate Marshmallow Cookies for the ultimate festive spread.
Planning a holiday party? Use my holiday drink calculator for a crowd to figure out exactly how much eggnog you’ll need for any group size.
Why You’ll Love This Recipe
- No raw eggs: The heated custard base makes it 100% safe and silky-smooth.
- Ultra rich & creamy: A combination of whole milk and heavy cream gives that perfect decadent texture.
- No alcohol required: All the festive flavor without the alcohol — perfect for family gatherings or anyone who prefers a zero-proof celebration.
- Make-ahead magic: It tastes even better the next day as the flavors deepen and the mixture thickens in the fridge.
- Simple ingredients, stunning results: You only need a handful of pantry staples to create a holiday-worthy treat.
Step-by-Step Instructions
1. Temper the Eggs
In a large bowl, whisk together the egg yolks and sugar vigorously until the mixture becomes pale yellow and thick — this is called “ribboning.” It should fall from the whisk in a silky ribbon that sits briefly on the surface before sinking back in.
Meanwhile, heat milk and nutmeg in a medium saucepan over medium heat until you see small bubbles forming around the edges. Don’t let it boil — you just want it hot enough to steam.
Now for the key step: tempering.
Slowly pour about ½ cup of the hot milk mixture into your egg yolks, whisking constantly. This warms the eggs gently so they don’t scramble. Once combined, slowly pour the tempered egg mixture back into the saucepan with the rest of the hot milk, whisking the entire time.
This step is what turns simple ingredients into custard magic.
2. Cook the Custard
Return the saucepan to the stove and reduce the heat to medium-low. Stir continuously with a wooden spoon or heatproof spatula, scraping along the bottom and sides to prevent sticking.
You’ll know it’s ready when the mixture thickens slightly and coats the back of your spoon. If you draw a line with your finger, the line should hold.
For safety (and peace of mind), use a thermometer: the custard should reach 160°F (71°C). That’s the sweet spot where the eggs are fully cooked and safe to drink, but not so hot that they curdle.
As soon as it hits that temperature, remove the pan from heat.
3. Chill and Finish
Stir in heavy cream and vanilla extract right away. The cream stops the cooking process and gives your eggnog that signature richness.
Next, pour the mixture through a fine-mesh strainer into a clean pitcher or bowl. This catches any tiny bits of cooked egg and ensures the texture stays perfectly smooth.
Cover and refrigerate for at least 4 hours — overnight is even better. The longer it chills, the thicker and creamier it becomes, and the spices have time to bloom beautifully.
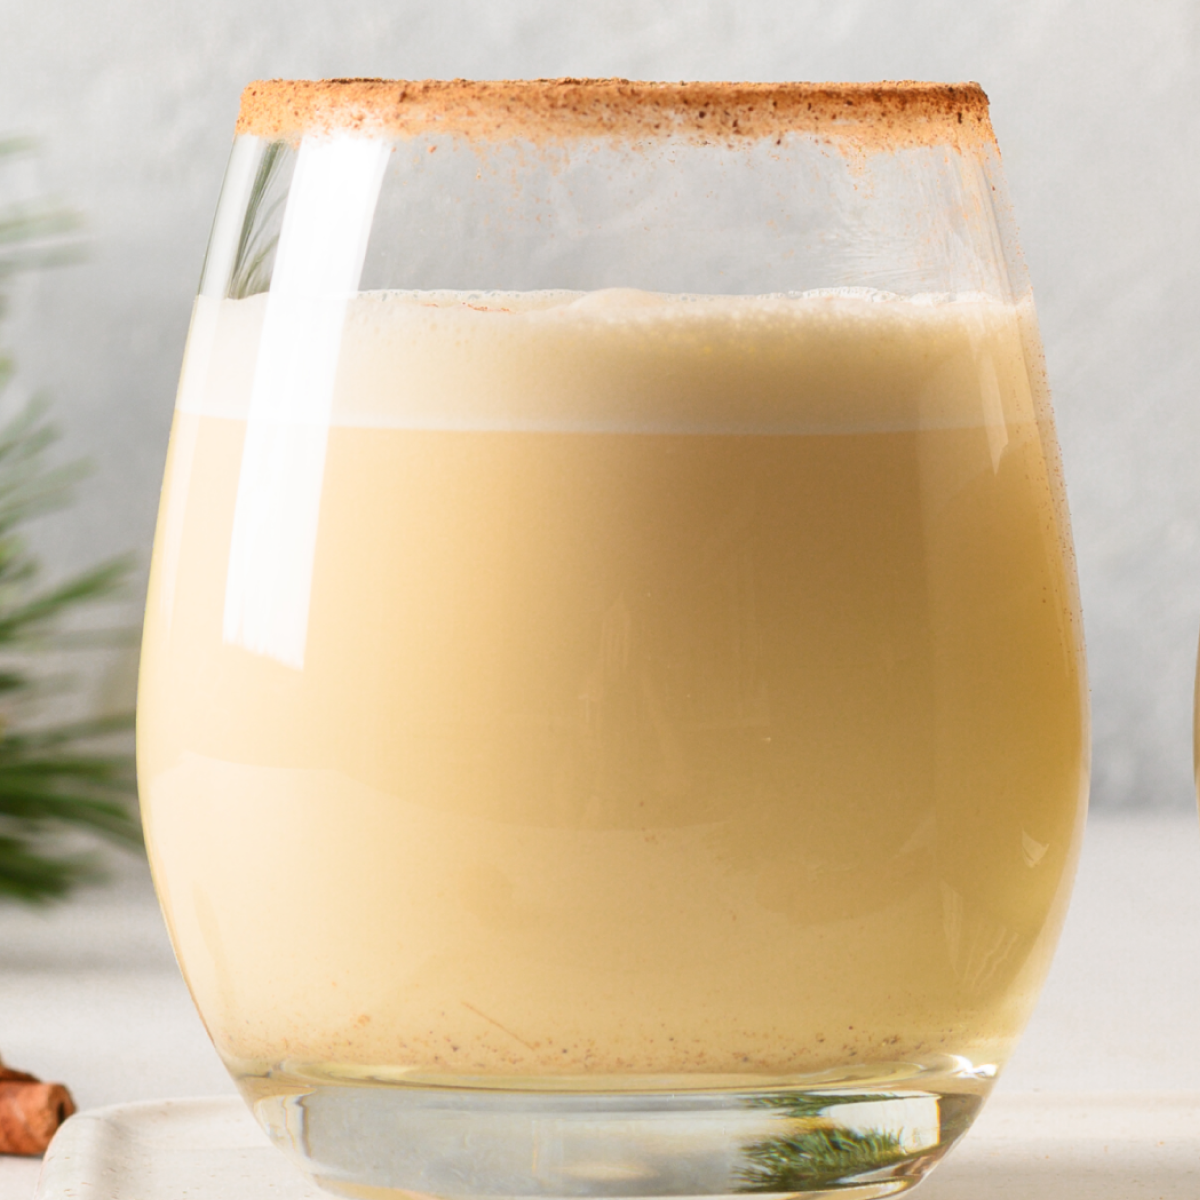
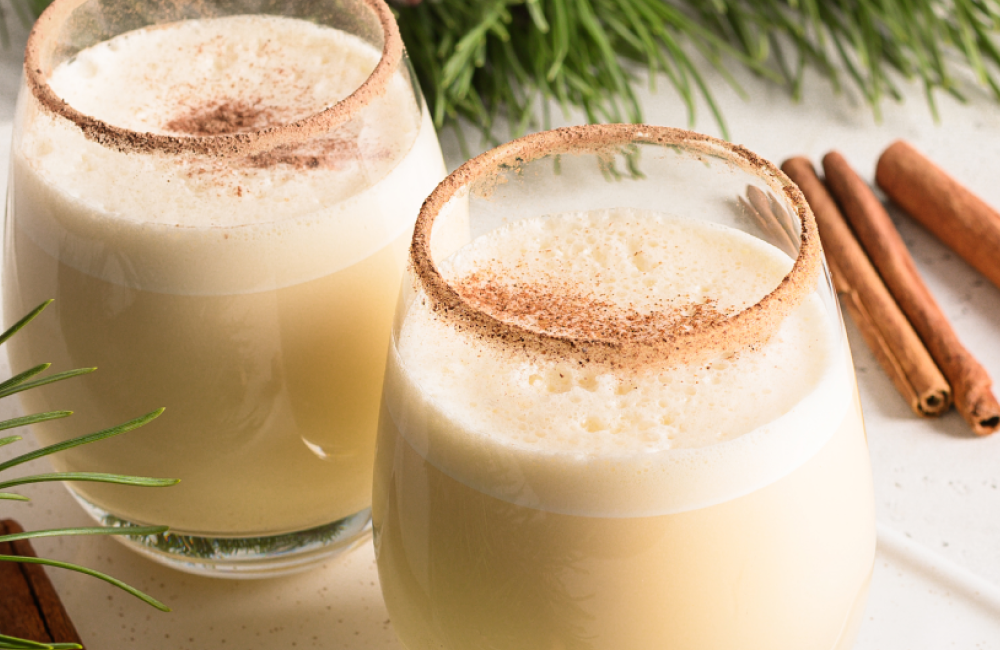
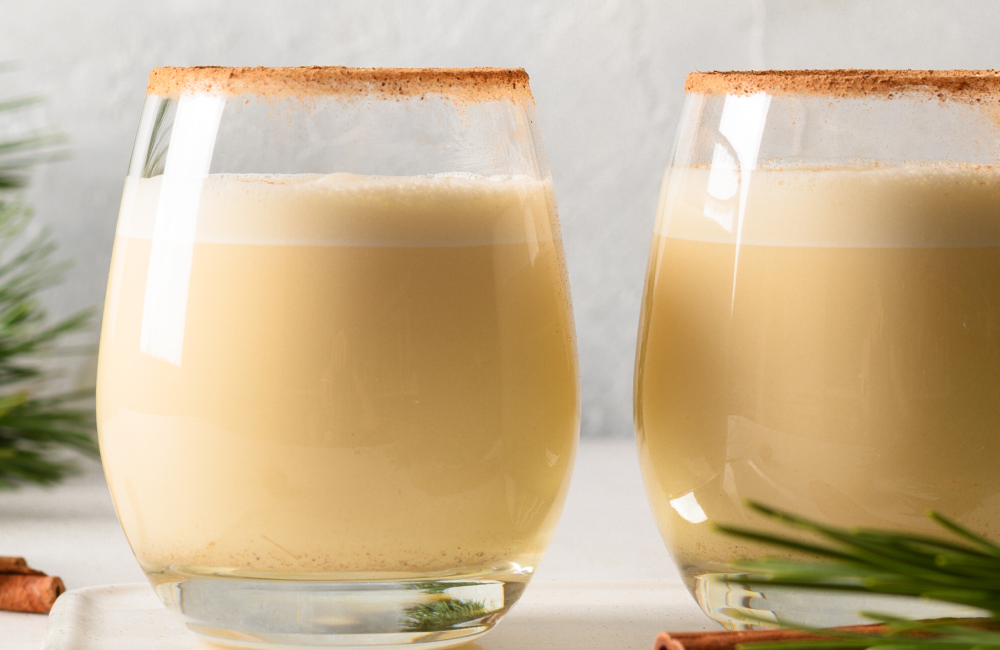
Before serving, give it a good whisk to blend everything evenly. Pour into mugs or glasses, top with a sprinkle of nutmeg, and add a cinnamon stick if you’re feeling festive.
Pro Tips for the Perfect Eggnog
Tempering Is Everything
If you pour hot milk into your eggs too quickly, you’ll end up with sweet scrambled eggs. Pour slowly and whisk constantly for a silky, custard-like base.
Use a Thermometer
It’s the difference between guessing and knowing. Once the custard hits 160°F, it’s safe to drink and ready to chill.
Don’t Skip the Chill
This step isn’t just about cooling — it’s when the eggnog thickens, flavors meld, and texture turns luxuriously creamy.
Make It Foamy
For an extra-special touch, beat 2–3 of the reserved egg whites until stiff peaks form. Gently fold them into the chilled eggnog before serving for a light, frothy finish that feels like sipping a cloud.
Spice It Up
Try adding a star anise, a few whole cloves, or even a strip of orange peel to the milk as it heats. Just strain them out afterward for subtle depth and complexity.
Variations
This homemade non-alcoholic eggnog is rich, creamy, and classic—but it’s also easy to customize depending on your taste or the occasion.
- Extra Creamy Eggnog
Increase the heavy cream slightly and reduce the milk for a thicker, more indulgent texture. - Dairy-Free Eggnog
Use full-fat coconut milk or a blend of almond milk and coconut milk for a creamy, dairy-free version with a subtle coconut flavor. - Spiced Holiday Eggnog
Add a pinch of cloves or allspice along with the nutmeg for a deeper, more traditional holiday spice profile. - Vanilla Bean Upgrade
Swap the vanilla extract for a real vanilla bean for a more intense, bakery-style flavor. - Lightened-Up Version
Reduce the cream and use more milk for a lighter, still creamy optio
Serving Suggestions
Serve chilled for the best flavor
Eggnog is richest and smoothest when fully chilled—give it a quick whisk before pouring for that silky texture.
Top with freshly grated nutmeg
A light dusting of nutmeg adds that classic holiday aroma and elevates the flavor instantly.
Add a cinnamon stick for a festive touch
It doubles as a garnish and a stirrer, adding subtle warmth as you sip.
Pair with holiday baked goods
Serve alongside cookies, cinnamon rolls, or other sweet treats for a cozy seasonal spread.
Make it part of a brunch spread
This pairs perfectly with pancakes, waffles, or French toast for a comforting holiday breakfast.
Serve in a pitcher for gatherings
Pour into a large pitcher or drink dispenser for easy serving at parties or family get-togethers.
Turn it into a dessert drink
Top with whipped cream and a sprinkle of cinnamon for a richer, dessert-style presentation.
Serve alongside holiday favorites like Molasses Crinkle Cookies or Gooey Hot Chocolate Marshmallow Cookies for a cozy, crowd-pleasing treat
Hosting a group? My party food planning guide with serving charts makes it easy to plan drinks and desserts without guessing.
Storage
Refrigerate properly
Store homemade eggnog in an airtight container or sealed pitcher in the refrigerator for up to 3–4 days.
Keep it well sealed
Because eggnog is custard-based, keeping it tightly covered helps maintain freshness and prevents it from absorbing other fridge odors.
Stir before serving
The mixture may separate slightly as it chills—just give it a quick whisk or shake to bring back that smooth, creamy texture.
Do not leave at room temperature
Eggnog should not sit out for more than 1–2 hours, especially at gatherings. Keep it chilled or serve over ice to stay safe.
Freezing not recommended
Freezing can cause the texture to separate and become grainy once thawed, so it’s best enjoyed fresh.
Make ahead friendly
This recipe actually improves after a few hours in the fridge, making it perfect to prepare the day before serving.
Why This Recipe Works
- Heated base = safety + luxury: Cooking the custard ensures smooth, safe results every time.
- Balanced texture: The ratio of yolks, milk, and cream is tuned for perfect creaminess without being overly thick.
- Simple yet elegant: No fancy steps or equipment — just good ingredients and classic technique.
- Family-friendly: All the traditional flavor, none of the alcohol.
Serving Tips
1. Keep it cold and creamy.
Eggnog is best served chilled. Pour it into a pitcher or punch bowl and keep it over ice, or refrigerate until the moment you serve.
2. Stir before serving.
Homemade eggnog tends to separate slightly as it sits, so give it a good stir before pouring to keep it smooth and frothy.
3. Offer toppings!
A sprinkle of nutmeg or cinnamon, a little whipped cream, or even a cinnamon stick makes it feel special — especially for holiday brunches.
4. Make-ahead magic.
Eggnog actually tastes better the next day because the flavors meld and mellow overnight. If you’re making a big batch, prepare it a day ahead and store it tightly covered in the fridge.
Final Thoughts
There’s something about a glass of homemade eggnog that just feels like the holidays. It’s cozy, nostalgic, and brings that quiet kind of comfort that turns an ordinary evening into something a little more special. The creamy texture, the hint of nutmeg, the warmth of vanilla—it’s the kind of recipe that quickly becomes part of your traditions year after year.
This is one of those easy homemade recipes you’ll find yourself coming back to, whether you’re hosting a gathering or just pouring a glass to enjoy by the tree after a long day. It’s simple, classic, and always feels like a little moment of celebration.
And if you really want to lean into that holiday feeling, serve it with my Extra Creamy Old Fashioned Fudge. There’s something about that rich, chocolatey bite alongside a sip of creamy eggnog that just feels like home.
If you’re building a full holiday menu, my complete party food planning guide will help you create a perfectly balanced spread with ease.
Homemade Non-Alcoholic Eggnog Holiday Recipe
Ingredients
Equipment
Method
- Start by whisking the egg yolks and sugar together in a large bowl until the mixture turns pale yellow and thickens slightly — this step should take about 1–2 minutes of whisking. You’re looking for that smooth “ribbon” stage when the whisk leaves light trails behind.
- In a medium saucepan, combine the milk and nutmeg. Warm it over medium heat just until tiny bubbles form around the edges (don’t let it boil).
- Slowly pour about ½ cup of the hot milk mixture into the egg yolks while whisking constantly. This is called tempering — it gently warms the eggs without scrambling them.
- Once combined, pour the tempered egg mixture back into the saucepan with the rest of the warm milk.
- Place the pan back on the stove over medium-low heat. Stir constantly with a wooden spoon or heatproof spatula until the mixture thickens slightly and coats the back of the spoon — about 6–8 minutes.
- If you’re unsure, use an instant-read thermometer: when it reaches 160°F (71°C), it’s safe and ready. Don’t let it boil or it can curdle.
- As soon as it’s thickened, remove the pan from heat.
- Add Cream and Vanilla, Then Chill
- Stir in the heavy cream and vanilla extract.
- For an ultra-smooth finish, pour the mixture through a fine-mesh strainer into a clean bowl or pitcher. This removes any tiny bits of cooked egg or spice.
- Serve and Enjoy
- Before serving, give your eggnog a good whisk to restore its silky consistency.
- Pour into mugs or glasses and top each with a dusting of freshly grated nutmeg. Add a cinnamon stick if you’d like that festive touch.
Notes
- Temper the eggs carefully: Slowly adding warm milk while whisking prevents scrambling and ensures a smooth, custard-like texture.
- Do not boil: Keep the heat at medium-low when cooking the custard—boiling can cause curdling and ruin the texture.
- Use a thermometer if possible: The mixture is ready at about 160°F (71°C), which ensures it’s safe and perfectly thickened.
- Strain for ultra-smooth texture: Pouring the eggnog through a fine mesh strainer removes any small bits and gives a silky finish.
- Chill time matters: Letting it rest for at least 4 hours (or overnight) deepens the flavor and thickens the consistency.
- Whisk before serving: Eggnog naturally settles as it chills—give it a quick whisk to bring back that smooth, creamy texture.
Related
Looking for other recipes like this? Try these:

Pin to Pinterest