There’s something almost magical about Brazilian cheese bread. The moment they come out of the oven—puffed, golden, and filled with that unmistakable cheesy aroma—you know you’re about to eat something special.
The first time I made these, I wasn’t expecting that signature texture. They’re not quite bread, not quite a roll… but perfectly chewy, stretchy, and crisp on the outside. Think: soft, airy centers with just enough bite to keep you reaching for one more.

And the best part? This version is incredibly simple. No complicated techniques. No hard-to-find ingredients. Just a handful of pantry staples and a method that works every time.
If you’ve been looking for a foolproof pão de queijo recipe that delivers authentic flavor with an easy process—this is it.
If you enjoy trying different styles of bread, this baked version is a fun contrast to my crispy, Golden Authentic Indian Fry Bread, which is fried instead and has a completely different texture.
Jump to:
Why You’ll Love This Recipe
- Perfect chewy texture – soft, stretchy centers with lightly crisp edges
- No yeast required – ready quickly with simple steps
- Incredibly flavorful from mozzarella + Parmesan combo
- Beginner-friendly with clear, repeatable steps
And if you’re in the mood to try a more traditional loaf, my Easy No-Knead Sourdough Bread is another beginner-friendly option with a completely different texture and baking method.
Why This Recipe Works
This recipe is all about starch hydration and balance.
- Heating the milk and butter activates the starch, creating that signature chewy texture
- Cornstarch helps mimic traditional tapioca flour elasticity
- The egg adds structure without making it cakey
- A blend of cheeses gives both melt and depth of flavor
It’s a simplified approach that still delivers that classic pão de queijo bite.
Ingredient Breakdown
Flour + Cornstarch
This combination creates a chewy, elastic texture similar to traditional tapioca flour.
Baking Powder
Gives lift so the breads puff up beautifully in the oven.
Salt + Onion Powder
Adds depth and balances the richness of the cheese.
Milk + Butter
Heated together to hydrate the starch and form the base of the dough.
Egg
Brings everything together and creates structure.
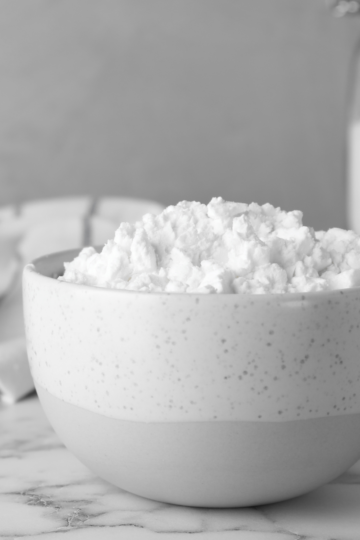
Mozzarella + Parmesan
Mozzarella gives stretch, while Parmesan adds bold, salty flavor.
Equipment You’ll Need
- Mixing bowl
- Small saucepan
- Wooden spoon or spatula
- Baking sheet
- Parchment paper
- Cookie scoop (optional but helpful)
I’ve linked all my favorite baking tools on my Shop My Kitchen page if you’d like to see what I use regularly.
Instructions
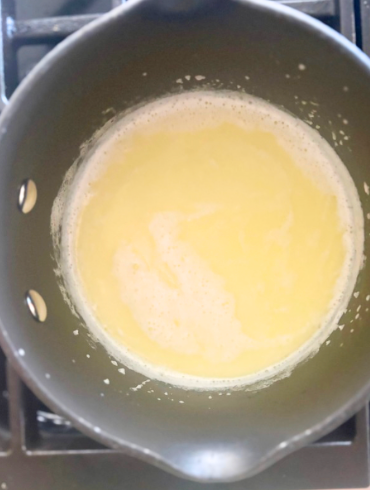
- Step 1: In a small saucepan, heat the milk and butter over medium heat until steaming and the butter melts (don’t let it boil hard).
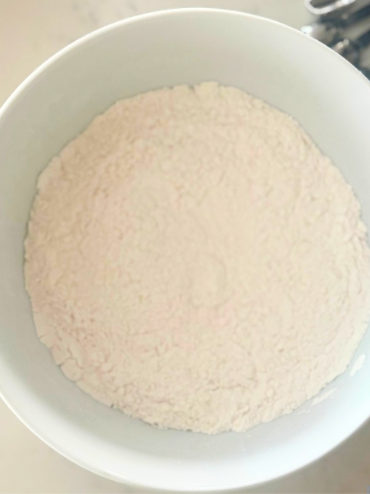
- Step 2: In a medium sized bowl combine all dry ingredients and mix well.
- Step 3: Add egg into dry ingredients incorporate well, then fold in cheeses just until combined.

- Step 4: Cook in oven for 12-15 minutes at 400 degrees, until slightly golden. Enjoy promptly.
Step-by-Step Tips for Perfect Brazilian Cheese Bread
- Preheat properly
A hot oven helps create that initial puff and structure. - Heat milk and butter gently
You want it steaming—not boiling—to avoid breaking the mixture. - Hydrate the dry ingredients
Pouring the warm liquid over the flour mixture is what creates the chewy texture. - Let the dough cool slightly before adding egg
This prevents scrambling and keeps the dough smooth. - Expect a sticky dough
It should feel soft and slightly tacky—this is exactly right. - Dampen your hands before rolling
This makes shaping much easier. - Don’t overbake
Pull them when lightly golden—overbaking reduces that soft chew.
Variations to Try
Extra cheesy – fold in small cubes of cheese for melty pockets
Garlic version – add fresh minced garlic or garlic powder
Herb cheese bread – mix in parsley or chives
Spicy twist – add a pinch of chili flakes

Substitutions
- No mozzarella? Use Monterey Jack or a mild melting cheese
- No Parmesan? Try Pecorino or Asiago for a similar sharp flavor
- Milk alternatives? Whole milk works best, but a neutral unsweetened alternative can work in a pinch
If you’re experimenting with baking swaps, check out my full baking substitutions guide.
Practical Example: When to Serve These
These are incredibly versatile and work for:
- Party appetizers
- Holiday bread baskets
- Brunch spreads
- Soup or stew sides
- Snack boards or charcuterie
They’re especially perfect when you want something unique but still crowd-friendly.
If you’re building out a full spread, something slightly sweet like my Easy Honey Cornbread pairs especially well with savory dishes and adds a nice contrast to the cheesy flavor here.
Troubleshooting
Why are my cheese breads dense?
The milk mixture may not have been warm enough to hydrate the starch.
Why are they too wet or spreading?
The dough may be too warm—let it cool slightly before shaping.
Why aren’t they chewy?
This usually comes down to starch activation—don’t skip the heating step.
Why did they deflate?
A slight deflate is normal, but over mixing or underbaking can affect structure.
Storage & Reheating
- Best fresh: within 20 minutes of baking
- Store: airtight container at room temp for 1–2 days
- Reheat: oven at 300°F for a few minutes to bring back texture
- Freeze: freeze baked or unbaked dough balls
Testing Notes (What I Observed)
Baking time sweet spot is right at golden edges—not deep brown
Dough consistency should be soft and slightly sticky—not dry
The cheese blend makes a noticeable difference in flavor depth
Smaller scoops produce better puff and texture balance

FAQs
Is this traditional pão de queijo?
It’s a simplified version using accessible ingredients while mimicking the classic texture.
Can I use tapioca flour instead?
Yes—this will make it even more authentic and chewy.
Why is the dough sticky?
That’s exactly what you want for that signature texture.
Can I make these ahead of time?
Yes—freeze the dough balls and bake fresh when needed.
Why This Recipe Works
This recipe works because it uses a hot milk-and-butter mixture to properly hydrate the flour and cornstarch, creating a stretchy, tender dough instead of a bread-like crumb. Letting the dough cool slightly before adding the egg ensures a smooth, cohesive texture, while finely shredded cheeses melt evenly throughout the dough.
Cornstarch plays a key role by softening the structure of the flour, mimicking the chew traditionally created by tapioca flour. Baking at a high temperature allows the rolls to puff quickly, forming crisp edges while keeping the centers light, airy, and cheesy. Each step builds on the last to create reliable texture and flavor every time.
Final Thoughts
Brazilian cheese bread is one of those recipes that feels impressive but is secretly simple. It’s the kind of thing you bring out at a gathering and instantly get asked for the recipe.
What makes this version so special is how approachable it is. No specialty techniques. No complicated steps. Just a method that works and delivers that classic chewy, cheesy bite every time.
Once you make these, they’ll become one of those go-to recipes you keep in your back pocket—because they always hit.
Brazilian Cheese Bread Without Tapioca Flour
Ingredients
Equipment
Method
- Preheat the oven to 400°F (205°C). Line a baking sheet with parchment paper.
- In a small saucepan, heat the milk and butter over medium heat until steaming and the butter melts (don’t let it boil hard).
- This step helps hydrate the starch so the dough becomes stretchy instead of bready.
- In a mixing bowl, whisk together: flour, cornstarch, baking powder, salt and onion powder.
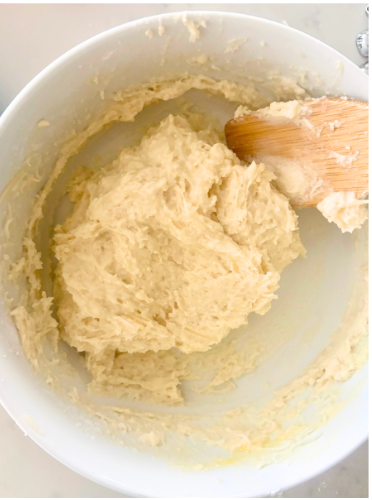
- Pour the warm milk-butter mixture over the dry ingredients and stir with a wooden spoon. The dough will look thick and slightly sticky.
- Let it cool for 3–4 minutes so the egg doesn’t cook.
- Stir in the egg until the dough smooths out.
- Fold in the mozzarella and Parmesan.
- The dough will be soft, warm, and slightly tacky — perfect.
- Scoop about 2 tablespoons per bread (or use a medium cookie scoop).
- Lightly dampen your hands and roll into balls.
- Place 2 inches apart on the baking sheet.
- Bake 12–15 minutes, until: puffed, golden at the edges and cheesy aroma fills your kitchen.
- They will not get as smooth and spherical as traditional pão de queijo — that’s normal.
- These are best within 20 minutes of baking (just like the original!).
Notes
-
Heat the milk gently.
The milk and butter should be hot and steaming, not boiling. This step hydrates the starches properly and creates the signature stretchy, chewy texture. -
Let the dough cool slightly before adding the egg.
A short 3–4 minute rest prevents the egg from scrambling and helps the dough smooth out beautifully. -
Expect a soft, tacky dough.
This dough should feel warm and slightly sticky—resist the urge to add extra flour. That texture is what gives the rolls their light, cheesy interior. -
Use finely shredded cheese.
Finely shredded mozzarella and Parmesan melt more evenly and distribute throughout the dough for better texture and flavor.
Related
Looking for other recipes like this? Try these:


Pin to Pinterest